Sunday, May 17, 2020

2 Day Acrylic Art Project for Kids

As a child, my parents gave me and my brother all the time in the world so we could get to explore non-academic skills like art, dance, writing journals, reading, singing and what not. I don't remember a day where my mom or my dad asked me to help them with house hold chores while i was investing my time in the creating something new. With the little financial support they had, we were encouraged to explore and experiment every weekend to do something new, not expecting the results to be 5 stars. We were blessed to have wonderful extended family, like my aunt and uncle, who will willingly buy good quality German watercolor paints for us to experiment with. I'm very thankful for those times, now i appreciate them more as an adult and especially as a parent. 

I would like to pass on the gift of art to my (now) 10 year old son. I want to show him what i learnt and if he is interested someday in his life, he might take it up. To create something from scratch, little or big, is a so fulfilling and leaves one with a sense of achievement. 

My H and I are very much involved in any of our son's school projects. One such project was kids Art competition in the County where he gets to compete with many other kids from different schools. He has been painting from when he was 4 years old. To make a kid sit down in a spot and focus on the technique is a big challenge. Over these years, I have grown patience and perseverance. After 5 years now, for the first time i can see the kid showing so much interest and is so willing to learn different techniques. That is a great start. As long as it lasts, I'm going to make the best use of the time :). We don't know the results of the competition because the Quarantine stalled everything. Nevertheless, i enjoy and cherish the wonderful time we spent together.

Beach Sunset


Title: Beach Sunset
Medium: Acrylic on Art paper
Method: Box Technique
Age group : 9 and above
Total time: 3 hrs (1.5 hrs in 2 days)
Pre-requisite: Lots and lots of patience, the ability to imagine and recreate the colors,  tons of interest 😊
Brushes: 1 round brush medium size, 1 thin brush for lines
Colors:
1. Titanium White
2. Cadmium Yellow
3. Indian Yellow
4. Scarlet Red
5. Burnt Siena
6. Ultramarine Blue
7. Manganese Blue Hue
8. Phthalo Blue


Day 1

The kid picked the concept from the 3 options i gave him - Landscape in Box technique, Autumn, Galaxy.

The first day can be quite strenuous as the kids have to learn the brush strokes and how to keep within the boundary of the box. So take it light on them. I highly recommend to do this with a 2 day break if kids are new to painting and if they are impatient to sit in one spot for a long time (like my son ;))

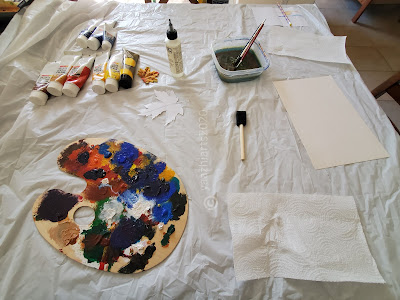
Always make clean space before starting to paint. Lay a plastic sheet underneath the painting space. I always recommend anyone to sit in a spot where there enough sun light, most likely closer to the window. Natural light is the Key. Get all the supplies in one place so you wont or your kid wont get distracted running around looking for things. I did not list out pencil, ruler, eraser and water in the list, as they are basic items for any painting project. 


Most importantly, feed your kid well before sitting for the project ;). I know they are always hungry and can make that as an excuse. That can play with their interest to focus and the spoil the attention span.

Now lets get started with the painting.....

Step 1 - Start the project with making the boxes on the art paper. Adults can help with this using a ruler and pencil. Make light impressions.


Step 2 - This technique can be applied to any subject. Few suggestions: Beach scene, Landscape scene, Monument, Animals

Step 3 - Since it is a box technique, kids should work one box at a time.

Step 4 - I suggest starting with areas that has lighter shade and finishing with darker shade.

[Note: The simple theory in art is you can always make a lighter shade to become darker by adding stronger pigments on top of lighter shades but not vice-versa.
In acrylic painting, this is possible as acrylics act as a primer. But i always prefer to have natural light in my paintings when i can avoid adding whites on top of dark colors]

Step 5 - The kid started with painting the sky in light yellow around the Sun with round medium brush to cover the area evenly.

Step 6 - Brush strokes should go from left to right. Please watch the video posted.


Step 7 - Once the light yellow is done, move to the outer areas where the ends of the boxes transition from yellow-orange-red-umber.


Step 8 - Let the painting dry and let the kid take break 😉. Painting one box at a time can be very tedious, meticulous and tiring for a 10 yrs old.

Day 2

The second day becomes a little easier as the kid had already got used to the brush strokes and boundary and have invested some patience 😀

Step 1 - Start with Blue shades, light blues right under under the Sun.

Step 2 - Move to darker shades for the outer boxes. Follow the same technique used to cover the sky.

Step 3 - Once all the boxes are covered along with making the transitions in shades, add an outline with darker shades around the boxes especially the 'T' spots between boxes. Make it subtle. I had to help my son here as the box outlines should be thin and not overwhelmingly prominent. See the photo below where i have marked the T spots.

Step 4 - Now is the time to make the sun shine bright and see the big smile on your kid's face that he is almost there 😁. He told me that the painting looked great. That is my big moment!

Step 5 - Add a good amount of Titanium White in a circular motion. Keep the paint thick so we can make some texture on the sun.

Step 6 - Once sun is done, draw white lines with this brush on the blue boxes right below the sun to indicate the reflection of sun's light on water.

Step 7 - The kid wanted to add some birds on the sky which i thought was a great idea. Make sure the birds are really small to make the sun and the scenery look magnificently big. It is all about the proportions of the objects and relativity.

Hope these step by step pointers help some kid in some part of the world to give this project a try. It is definitely a fun project for Adults and Kids to do together and build some quality time together as a family. The kids will remember these times when they grow, i promise!

Beach Sunset


Do leave a comment and a photo of the finished product if you gave it a try.
Happy Painting and making new memories with kids at home!!! 😊

Wednesday, May 13, 2020

DIM SIM in Clear Soup

Sitting through the quarantine days in 2020, the only change I like to bring in my everyday life to my family is venturing in different cuisines. My family has fervent travelers. We spend so much time planning to visit a new location to experience and explore new culture and meet people of the world. The planning gives us a sense of what to look forward to. 

Most important part of the travel is food that one gets to explore and experiment. I have been missing the hot, soft, flavorful dim sims for quite sometime now. Never had attempted to try them at home as i was so sure i was going to ruin my wonderful memories of eating those dim sims in Singapore. But are Dim sims same as Dumplings? It is a very strong topic to argue about. In a gist i concluded that Dim Sims and Dumplings can be cousins, from the locals of Singapore.

My good looking dashing Dim Sim

Now that I'm left with no choice but to drool over those photos of dim sims in chili oil taken a while back and the fact that i have a lot of time in hand, i finally took the challenge to recreate those dumplings at home. I did some research and i also have a video of how dim sims (with ground pork) were made in a small eatery while in Singapore. Funny, i had to pause and replay the video so many times to get the hang of it as the chef was making 10 dumplings in 10 secs, like it was his second nature. The secret to get a perfect looking dim sim is in the way the dough is rolled and folded. I was not even close to the quality you can see in the below photo. But hey I'm not a professional (yet). I will be there sometime in like 10 years may be! ;)

Photos clicked in a small eatery in Singapore


Ingredients:
=========

For Dough (to make 8 dim sims)
---------------------------------------
Maida / All purpose flour - 2 cups
Oil - 2 tsp
Salt as needed

For Dim sim filling
------------------------
Carrots diced - 1/2 cup
Cabbage shredded - 1 cup
Cauliflower shredded - 1/2 cup
Mushrooms diced - 1 cup (Replace Mushroom with ground chicken or pork if desired)
Spinach - 1/2 cup
Onions diced - 1/2 cup
Green chili / Jalapeno - few small bits
Ginger Garlic paste - 1 tsp
White sesame seeds - 1 1/2 tsp (optional)
Dark soy sauce - 1/2 tsp
Sriracha/Red chili sauce - 1/2 tsp

For Clear soup
-------------------
Vegetable/Chicken Broth - 3 cups
Frozen Green peas - 1/4 cup
 Frozen corn - 1/4 cup
Spinach - 1 cup
Mushrooms - 1/2 cup
Spring onions
Salt as needed
Black Pepper as needed

For Chili oil
----------------
Crushed dried red chili
Sesame oil (Highly recommended. If not available, substitute with sunflower oil)

How to make Dim Sim

1. Add the items under 'For Dough'. Mix it with hand to get rid of lumps. Add little water at a time to knead it to a firm dough. Once the dough is smooth and firm, set it aside for 30 mins with a lid covered to make sure the dough doesn't get dry.

2. Gather all the items listed under 'For Dim Sim filling'. Make sure to diced the veggies into tiny bits as shown below:


On a pan, add 1 tsp of sesame oil (or sunflower oil). Once the oil is hot, add chopped onions. saute until translucent. Add white sesame seeds to onions. Wait until the seeds pop. Add all other veggies that were cut. To this mixture, add soy sauce and sriracha sauce. Saute until the veggies are half cooked but still crunchy. Keep aside to let it cool.


3. Divide the dough to small balls. Roll them as thin as possible with a rolling pin. Use dry flour to dust on the dough if they are sticky. Make sure the ends are thin and the center a slightly thicker. To get a perfect round, i used a bowl with sharp edges to cut it out. Add a small spoon of filling to the rolled out dough. 

4. Now comes the tricky part and i was so involved in getting the fold right that i forgot to click a photo. Technically it is like folding any of our Indian paranthas with filling inside. Fold the sides like a zig zag pattern until the circumference is covered and twist the top to close the opening. Just make sure you dont add too much filling then it becomes difficult to seal the Dim Sim. 

5. Make a batch of Dim Sims and then add it to a steamer. I used an Idli pan for the purpose.Steam the Dim Sims for 7 mins. Take the steamer of the heat and let the dim sims sit int he steamer until they are ready to be served as a snack or to be added to a hot soup.

How to make Clear Soup
1. Pour Vegetable/ Chicken stock in a pan. Add Frozen peas, corn, spinach, mushrooms to the stock. Bring it to a rolling boil. Add salt and black pepper.


How to make Chili oil (in a hurry)
1. Add 1 tbsp of Sesame oil (or sunflower oil) to a small pan. Keep the pan in medium heat. Add crushed Red chilies (with seeds) and immediately add 2 tsp of red chili powder to give the smokey flavor.

Service Dim Sim and Soup in a bowl while they are hot. Sprinkle some spring onions on the soup. If you wish to have the Dim Sim as such, eat it as a snack with some hot green tea on the side.


I also made a side serving of Vegetable-Egg Fried Rice on the side for the hungry bellies at home :).


Don't forget to add a dash of chili oil to the hot soup with dim sim. They just taste so heavenly, flavorful and amazing on a rainy day. My boys had a sumptuous lunch on a weekday! 


Guten Appetit!
Happy Slurping!


Thursday, June 27, 2013

ஆமை வடை / Masal Vadai / Paruppu Vadai / Lentil Fritters


My family's all time favourite snack.Born in Madurai i never ever assumed anybody would even cook vadai at home.Because we get different varities of vadai from so many டீ கடைs (tea shop) all around round the clock....and who would care to put in all the efforts to make one variety of vadai at home ;-),luxury i know!But never realised till i got to live in Bonn , Germany after i got married.

Two dishes i learnt(dint cook but only took notes:)) before i flew to Germany from one of my good friends Vinodh,who is a better cook than i am was Dal and Masal Vadai.Dal being A's favourite and vadai being mine.....made sense to atleast have two recipes handy ;-)!

You should be wondering why this name to Masal Vadai.I assume Aamai vadai was named after the fact that the vadai itself looks like an "Aamai" (translated to 'Tortoise' in English) with hard shells around soft insides.

Whenever i make this vadai,one person i never forget to think of is my dad-in-law.I should say he is an ardent fan of this Vadai,especially when I make it.We interact more like friends than in laws.It is a pleasure to make him this vadai whenever he visits us.
Any usual recipe will use channa dal in a larger proportion.Here i add toor dal more for a healthier version.


Ingredients:

Toor dal / துவரம் பருப்பு  - 1 cup
Channa dal /கடலை பருப்பு  - 1/2 cup
Onion - 1 medium
Green chillies - 3
Curry leaves - 1 sprig
Coriander leaves - few chopped
Pudina leaves - one or two chopped
Raw rice - 1 tbsp
Cumin seeds - 1 tsp
Fennel seeds - 2 tsps
Salt as required
Oil to fry


Preparation:

1.Soak Toor dal,Channa dal and Raw rice in ample amount of water for atleast 3 hours.
2.After 3 hours,grind the dal mixture coarsely without any water.(save a small handful of dal before grinding....gives a crunchiness to the vadai when fried).If you think you should add water depending on the mixer you are using...add very little water.
3.Once done,add chopped onions and the rest of the ingredients along with salt and mix well using your hand.


4.Add oil in a kadai while you mix the above.
5.As soon as the oil is hot enough,make small balls of the mixture and pat them little(i like my vadai small)
6.Drop them in oil one by one.You can fry 6-7 vadais in a batch depending on the size of the vadai and the kadai.


7.Turn the vadai around after like 2 minutes.Once the sizzling stops you know your vadai is done.Just see to it the colour of the vadai is brown like in the picture.


Notes:
1.If you are running out of time and dont have 3 hours to soak the dal,add hot water to the dal for an hour and you will get your job done(works most of the times for a lazy-cozy like me:))
2.Add salt to the ground dal just before you intend to fry.Because adding salt and leaving the mixture out for a long time makes the mixture watery.
3.Raw rice is added to make the vadai crispier.Instead my mother adds Split peas / பட்டாணி பருப்பு .This gives a different flavor all together.I would hghly recommend you to try this if you get the split peas at your place.
4.If you think you can handle the after effects of the snacks...go ahead and reverse the ratio of the dals ;-)


Nothing can compare to the taste of crispness of the vadai ,smell of fried dal and the hottness of green chillies now and then in the mouth  along with a sip of hot coffee on a rainy day:-)


Guten Appetit!
Happy Snack-ing!!!


Monday, June 3, 2013

Poondu Milagu Kuzhambu / பூண்டு மிளகு குழம்பு / Garlic in Pepper Gravy

Poondu Milagu Kuzhambu is one dish i wish to have right after a week of heavy meal because of its medicinal values.


Benefits of Garlic:
- help reduce heart disease
- lower blood pressure by dilating or expanding blood vessels
- helps prevent blood clots 
- reduce pain and other symptoms in people with rheumatoid arthritis
- an antibiotic killing a range of microbes, including viruses, bacteria, fungi, and parasites
Benefits of Pepper:
- treats constipation, diarrhea, earache, heart disease, hernia, indigestion, insect bites, insomnia, joint pain, lung disease, sunburn and toothaches. 

Garlic and pepper together simmered in tamarind has been found to 
- aid digestion 
- cleanse digestive system
- relieve abdominal bloating, nausea, vomiting, anemia 
- they also help lactating mothers in the production of breast milk.


As kids,I and my elder brother had most similar tastes when it comes to food or may be it was like i got inspired to try by looking at him relishing his food;-).Either ways thanks to him for making this wonder kuzhambu a part of my food palette:-).


Ingredients:

Garlic pods - 10
Curry leaves - 7
Tamarind - lemon sized
Jaggery - a pinch
Turmeric powder - 1/4 tsp
Fenugreek powder - 1/4 tsp
Gingely oil / Nallennai - 3 tbsp
Salt - as required

To grind into a fine paste:

Garlic pods - 3
Channa dal - 2 tbsp
Urud dal - 2 tbsp
Peppercorns - 2 1/2 tbsp
Coriander seeds - 2 tbsp
Curry leaves - 1 sprig
Whole dried red chilly - 2
Raw rice - 1 tsp


Preparation:

1.Pour 1 tbsp oil in a kadai and roast the items below 'to grind' one after another for 2 minutes.


2.Grind the above mix with little water and make it into a fine paste.

3.Soak tamarind in hot water and keep the pulp aside.Let the pulp be thick as it reduces the time while thickening the gravy.

4.In the same kadai,pour 1 tbsp oil and add fenugreek powder.Make sure you don't burn them as it will give a bitter taste to the gravy.

5.Then add curry leaves followed by garlic pods.Let it fry for a minute till the garlic pods turns light golden brown.

6.Add the thick tamarind pulp and turmeric powder.Mix well till the raw smell of tamarind goes off.


7.Now mix in the ground paste.


Here, i like adding freshly coarsely ground pepper,may be 1 tsp,to give the freshness of the pepper to the gravy.


8.Add required salt and let the gravy thicken.


9.Finally add jaggery to counter the hot n sour taste.


9.When you see oil appear on the gravy your kuzhambu is ready to be served.


As this gravy is prepared as pathiya saapaadu(Non fatty diet food to cleanse the digestive organs), i dont prepare any side dishes.Just a microwaved appalam will do best!:)
You can store this gravy in the refrigerator.Stays good up till a week's time.


Healthy Lunching!!! :-)


Friday, March 1, 2013

Roti / Indian Bread

   Roti or Indian Bread is a flat bread made of whole wheat flour.It is a staple food in most of the North Indian States.I wasn't a big Roti lover till i got married.Anand(H) is a big fan of Roti n Dal.I cannot forget the first time i saw him eat Roti with Dal,which tasted so bland to me.Those are moments when you realize people have so different tastes in life yet can live together under the same roof.So i buckled myself up to make Rotis every day for dinner to impress him:-).Except for the strange shapes of different countries, my Rotis were soft and good to eat.I used to take pride when H relishes every bite of it(but should mention,he still relishes anything and everything i cook…..he is sweet that way).Because he thought they were my first attempts.But then he dint know i already have experience in making,not-so-perfect but good Rotis.
   
   When i was in Hyderabad for my Masters Degree’s Project work for a year with my room-mates,we took turns to cook dinner every night.When i had my turn for the first time, i still don't understand why, but i made Rotis with Chole Masala without knowing how to make them.My roomies look at me as someone who excels in almost everything and obviously i dint want to lose that:-).We dint have a recipe book or internet at our place…..so it turned out to be a real life experience which i will never forget.I added a little warm milk and a spoon of ghee thinking it might enhance the taste(which eventually did).I forgot adding salt and did a trick of mixing salt in  a spoon of water later and mixing in with the dough to only find it watery.So i had to pile up more flour to compensate the water.And to my surprise….it turned out to be the best Rotis that we ran out of them.You should had looked at how relieved i was that day.It was like appearing for an important exam and i had score it.So later on, everytime when it was my turn i was asked to make rotis…..hehehe.End of the day,It is all about confidently taking up a challenge and most importantly listening to your instincts:-).


roti18_wm


While i was working in Chennai,i learnt to make the perfect round rotis from my friend Jyothi,who is an awesome cook and a wonderful person at heart.We were flatmates and still good friends.She taught me the most simplest and the most effective way using the rim of a tiffin box to cut round rotis from already laid flat dough:-).But Jo,i now make round rotis,if not like you,but atleast something near round by rolling the dough:-).


Ingredients:
Wheat flour – 5 cups ( makes around 10 normal sized rotis)
Salt – as required
Water – as required(probably 3/4 of a cup)
Cooking oil – 2 tbsp
Warm milk – 2 tsp(optional…i dint use it now)
Ghee – 1 tsp(optional)

Preparation:
1.Mix flour with salt ,warm milk,ghee and a 1 tbsp of cooking oil
2.Add a handful of water and start kneading the dough.As you finish if you feel the dough needs more water dont hesitate to add more at every stage.The mix might look a little watery at first,but the more you knead it will turn out to be good.

roti1_wmroti2_wm roti3_wm

3.Add the remaining 1tbsp of cooking oil when you feel the dough is quiet sticky and knead again.The more you knead,the softer your Rotis will turn out to be.

roti4_wm roti5_wm roti6_wm

4.After a while,you will notice no dough sticking to your hand and the sides of the vessel.That is when you are done.I throw the dough into the vessel taking the dough in my hand a few centimetres high from the vessel (just like bouncing a basket ball on the ground :-)).Saves lot of energy while kneading:-).

roti7_wm  roti9_wm

5.The right consistency of dough that yields soft Rotis should be not be too tight when you poke it with your finger.Your finger should easily get through.

roti8_wm

6.Take a bit sized dough in your hand and roll it between your palms into a ball.

roti10_wm roti11_wm

7.Using your palm press the ball of dough a little flat

roti12_wm

8.Dust both sides of the dough using flour just to make sure the dough doesn't stick to the rolling pin while rolling it out and thus gives a smooth roll.

roti13_wm roti14_wm roti15_wm

9.Start rolling from the centre and start giving slight pressure towards the outside on the sides.Keep rolling to smooth out the dough and make it flat.The round shape comes in a few trials and practices.Do not give up..some day you will get it:-).
10.On a hot Tawa,place the flattened dough and wait for few air bubbles to appear on the upper surface.Once you notice then,coat a little oil across the Roti and flip the side.

roti16_wm roti17_wm

11.Again apply a light coat of oil on this side and you will find the roti puffing up.As soon as you spot few golden brown dots on each side,you can take it out of the pan.

Serve rotis with any side dish.They even go well with some curd,pickle and green salad.

We had them with Keema Mattar :-)


keema-mattar8_wm


Tips:
#You can cook the rotis without oil and make them into phulkas if u have a gas burner.
Once air bubbles start appearing on one side pick the roti with a tong and place it directly on a gas burner set on low flame,the raw side on top of the burner.Once it puffs,flip.And take it out.They are much fluffier than rotis.(you have to be really quick to not let let the flames burn the phulka)

Happy Roti-ing ;-)!
Guten Appetit!